
How ads are organized
Somewhat like a set of Russian dolls, ads in SmartNews Ads Manager are organized into three main layers: campaigns, ad groups, and individual ads.
Items in each layer have their own tab in Ads Manager, and each has its own role to play.
Campaigns
- At the highest level, campaigns represent specific objectives for your client or organization. Each campaign has an objective such as Awareness, Traffic, App promotion, or Sales. Campaigns are designed to coordinate multiple ad groups with a shared strategy, budget, and bidding method.

Ad groups
- At the operational level, ad groups allow multiple ads share the same targeting settings. An ad group’s job is to fulfill its campaign’s budget and strategy by reaching a specific audience segment. Ad group settings allow you to target delivery to specific age groups, regions, or custom audiences.

Ads
- Individual ads represent the most essential element of an ad campaign. Their settings consist of their ad format, creative, and link destinations.

Breakdowns and viewing modes
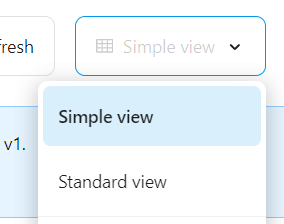
Switching between Simple and Standard views
When looking at ad performance at a glance, Simple view displays the most commonly used columns such as your budget spent, viewable impressions, and costs per result.
Select Standard view to see a more complete list of metrics such as clicks, cost per click, and reach. Ads Manager will switch back to simple view whenever you switch ad accounts or start a new session.
Breakdown view
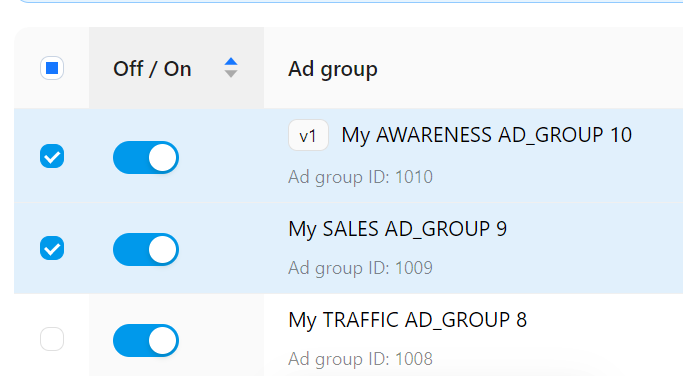
To view more detailed breakdown of select items, first select the checkbox to the left of each item you wish to view, followed by Breakdown at the top of the list.
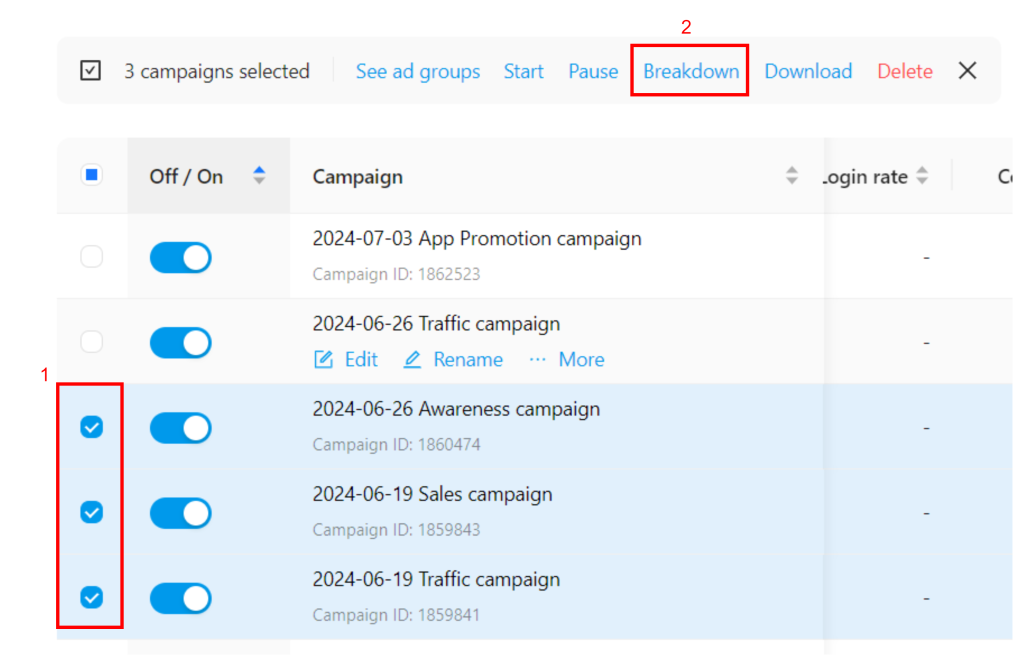
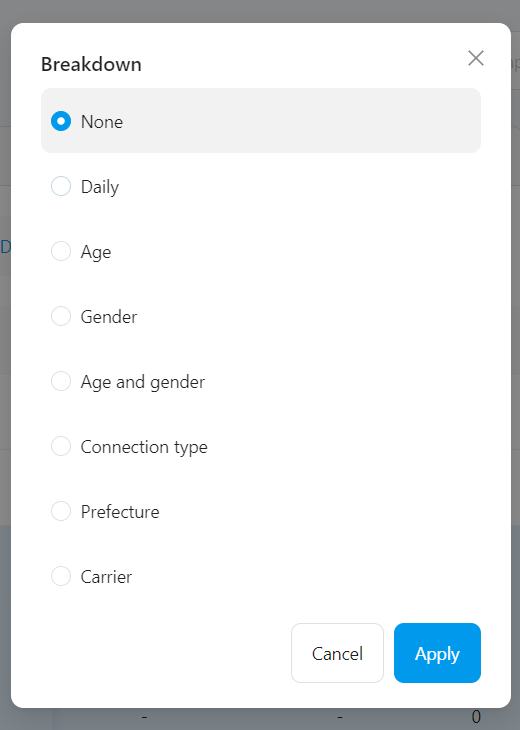
Select the breakdown category from the pop-up. This will determine how each selected item is divided.
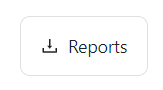
Select the Reports button to download a CSV version of your selected items.
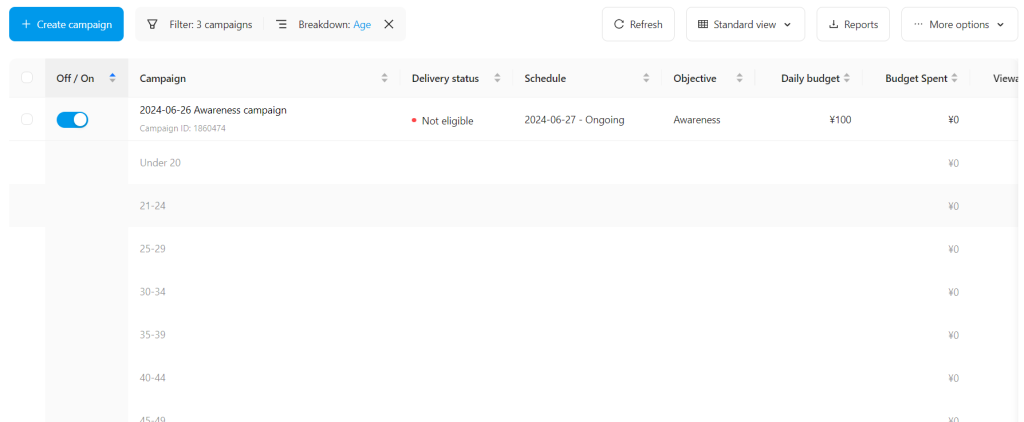
A campaign broken down by age
Copying and deleting items
Copying items
To create a new item based off another, mouse over the item in the list and select More > Copy (item type). This opens the item creation screen with cloned settings from the copied item. You can then modified the duplicated settings as needed to create your new item.

Deleting items
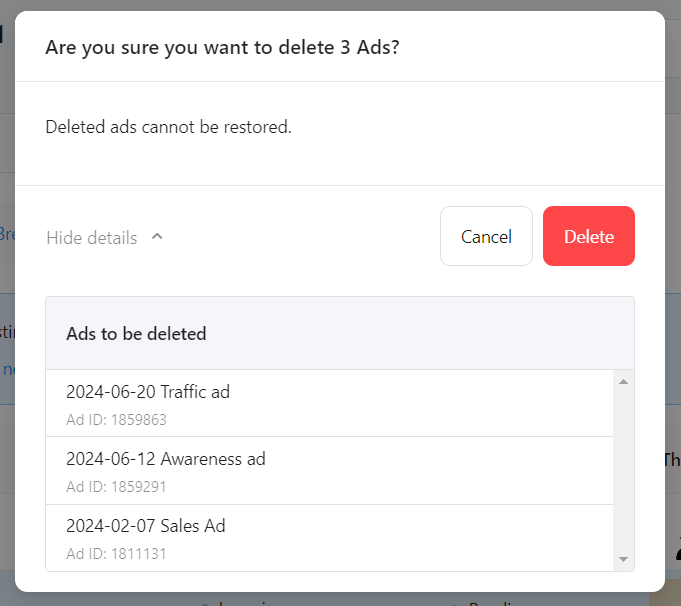
You can delete any item even if it contains ads that were already submitted for review.
Deleting an ad submitted for review will automatically cancel the review process. Ads that are currently running when deleted will stop delivering within 30 minutes of being deleted.
Once deleted, items can’t be restored.
To delete items:
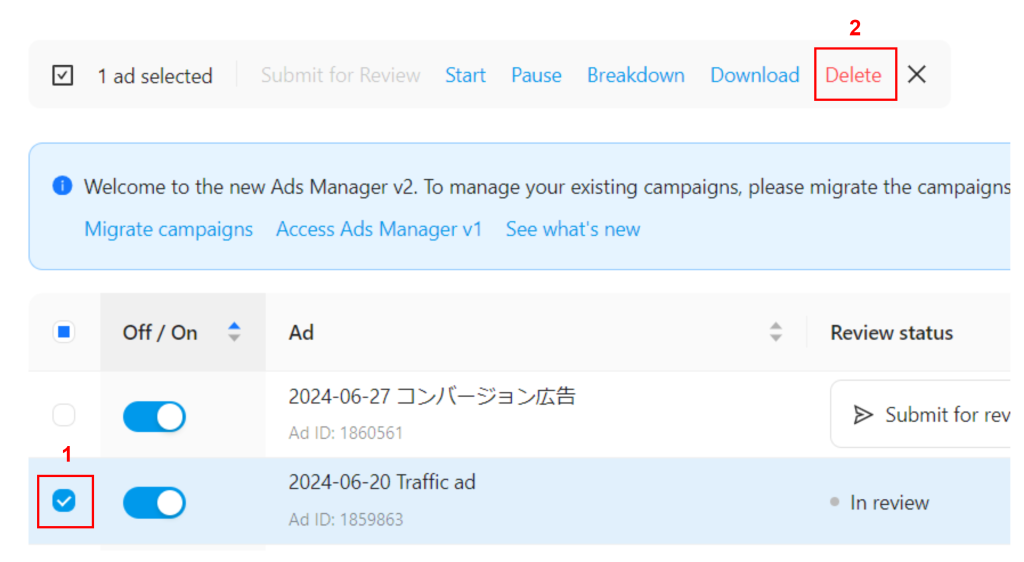
1Select the checkbox to the left of the ad, ad group, or campaign you wish to delete. You can select any number of items on each tab.
2Select Delete from the top of the list.
3A confirmation box will appear with a list of items to be deleted.
Including deleted items in metrics and reports
By default, deleted items won’t appear in lists or downloaded reports. Deleted items also won’t be counted towards the total item counts shown at the bottom of item lists.
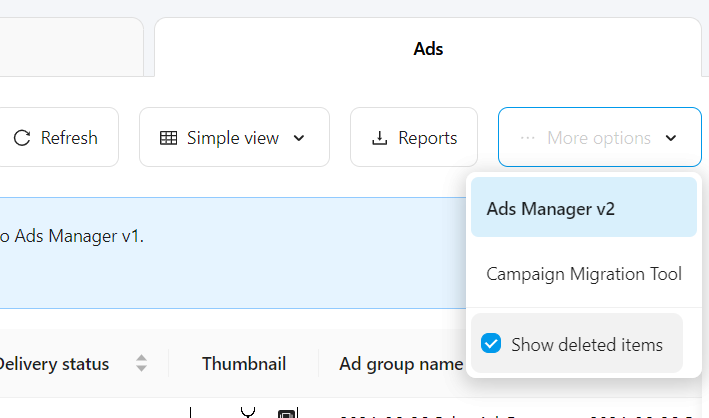
You can choose to show deleted items by selecting More options > Show deleted items from the dropdown menu.
Deleted items will appear lower in the list as deactivated ads. When Show deleted items is selected, these deleted ads will also appear in your downloaded CSV reports. They’ll also be added to the total item count at the bottom of the list.
| Even if ads are deleted, any clicks, views, conversions, or other performance results will still be counted as part of their parent ad group or campaign performance. |
Show and hide columns in the main lists
Ads Manager lets you easily customize which columns to show in the content tabs. You can use this to cut down on unnecessary clutter, or view and compare all your ads’ headlines at a glance.
Customizing your column view
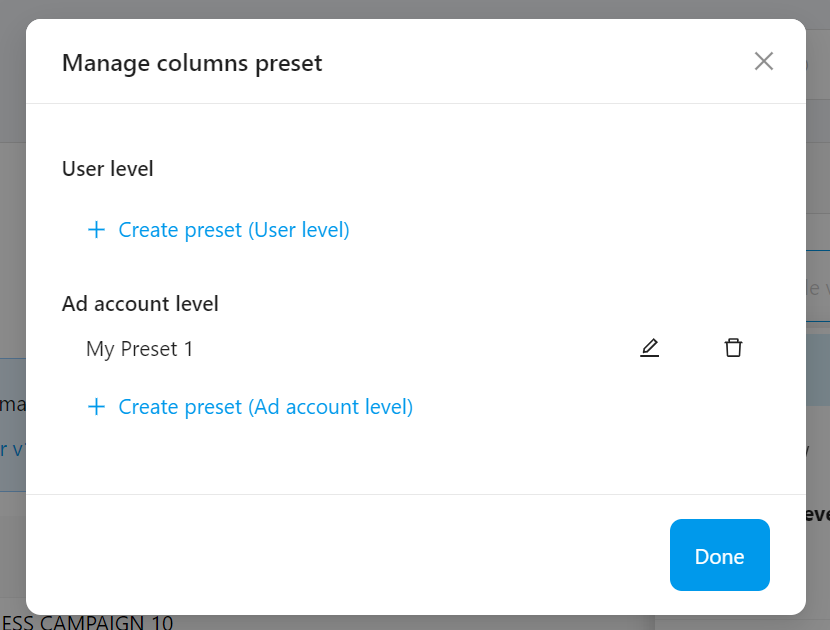
1Select the view selection dropdown menu followed by Manage column presets.
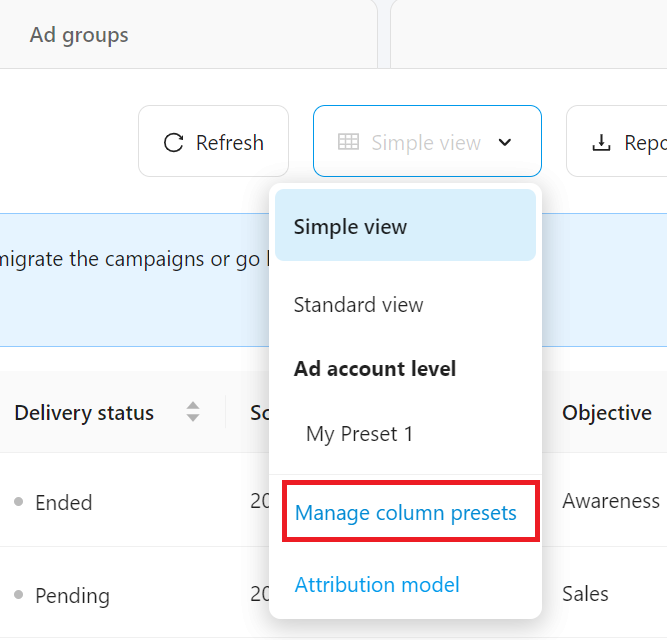
2Choose whether your preset will exist on the user level or ad account level.
User level:
Select if you’re the only person who needs to use this preset.
Ad account level:
Select this to make the preset available to everyone who uses this ad account.
3Enter a name for your preset and select your columns.
Select which columns to include by selecting the boxes from the left-hand side windows. Column categories are divided into Advertiser information, Popular metrics, and Conversion metrics.
The right-hand column lets you change the order that columns appear in the main lists by dragging and dropping each row by the handle on the left.
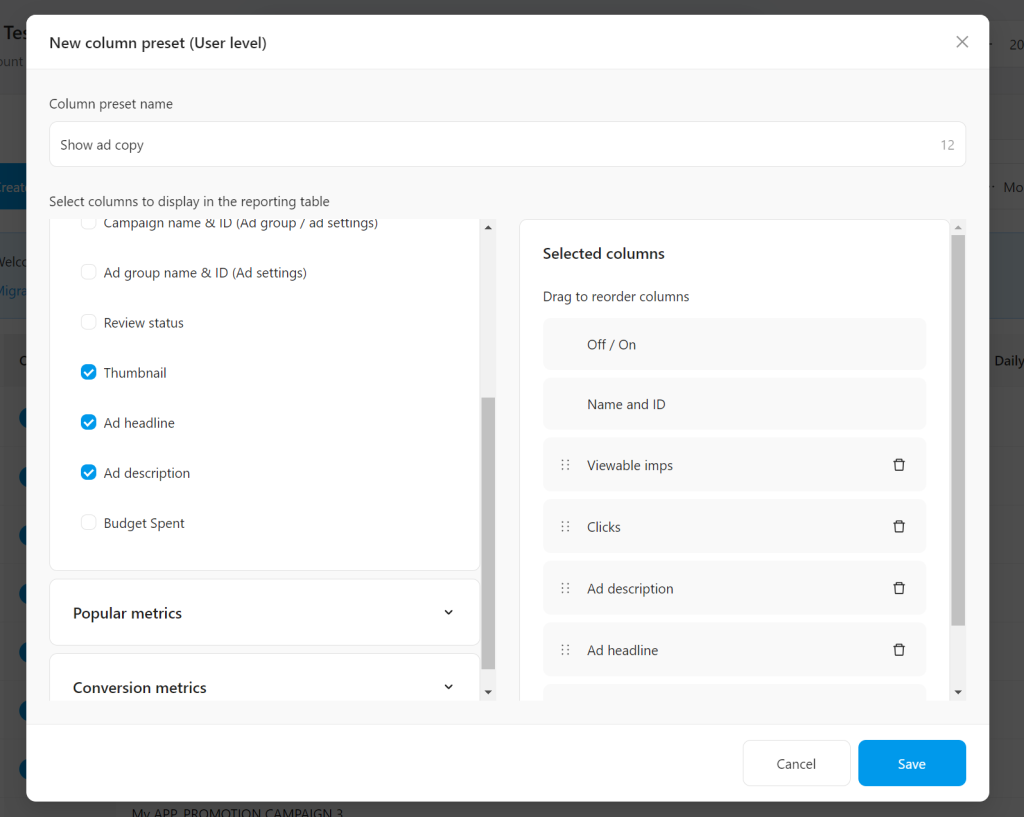
4When you’re satisfied with your columns, save your preset by selecting Save in the bottom-right corner.
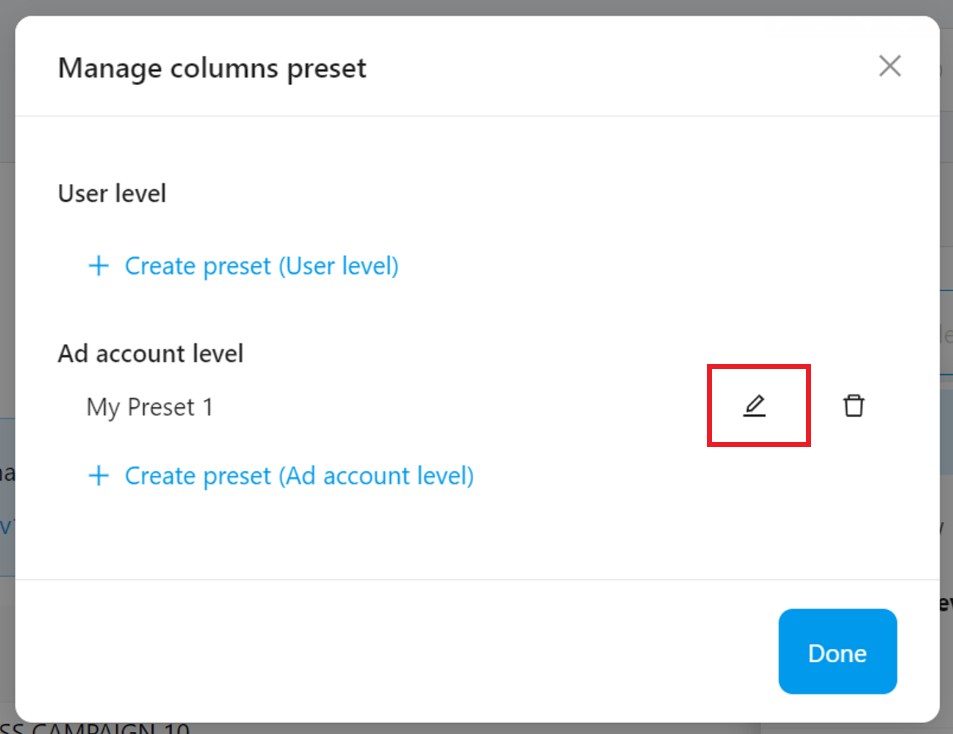
You can edit your preset at any time by selecting the pencil icon on the Manage columns preset screen.
How many columns can I add to each preset?
- Each preset can hold up to 10 custom columns.
Will my custom columns affect the columns included in downloaded CSV reports?
- Yes, downloaded reports should match the columns shown on the screen.
Show breakdowns and filter items in list view
Ads Manager lets you quickly view daily breakdowns of your campaign, ad group, or ad performance without having to download a report.
This means you can check ad performance by various metrics without having to leave list view.

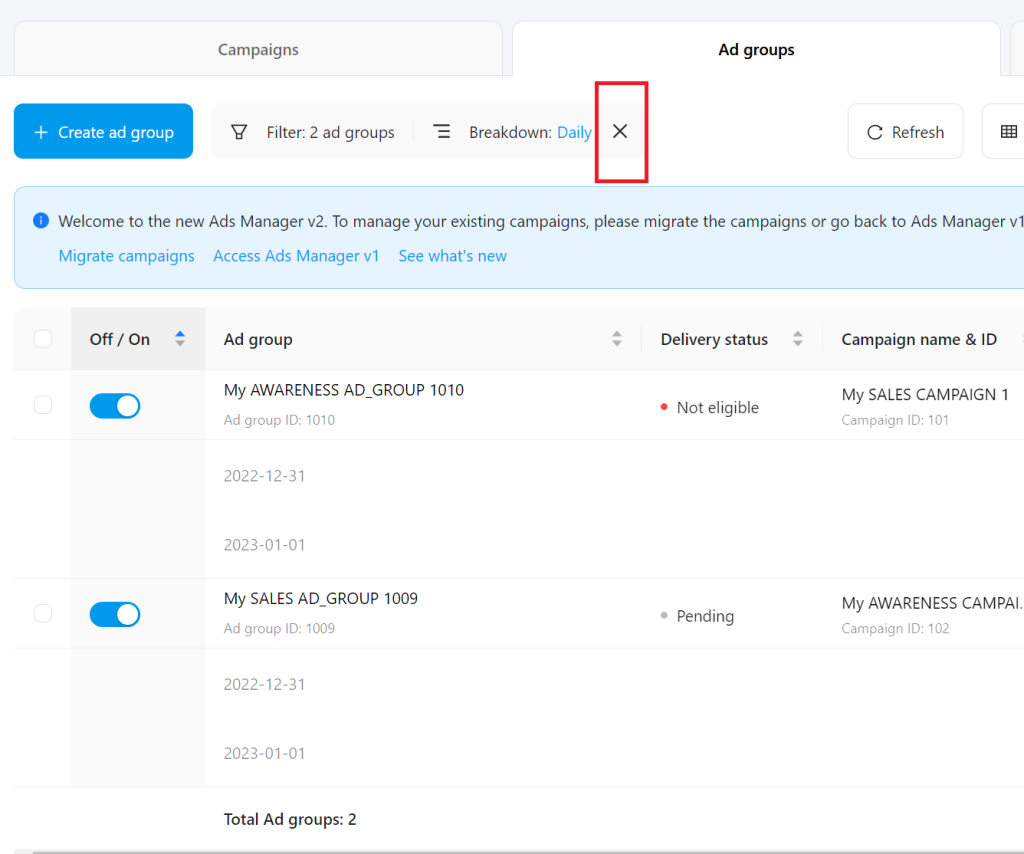
1Start by selecting the check box on the left-most column next to the items you want to view in detail.
2Select Breakdown from the top of the screen.

3Select how you want to breakdown these items. To view ad performance on a day-by-day basis, for example, select Daily.
Selecting None won’t provide a breakdown view, but will filter your selected items to let you view them in isolation.

4To go back to normal view, select the ✕ at the top of the screen.
Can I download my filtered view as a CSV report?
- Currently, these settings don’t affect your downloaded CSV report. You can still download a report with custom breakdown settings by selecting Report at the top of the list.
Note that downloaded reports can only include up to 75,000 rows and can’t be larger than 30 MB.
Is there a limit to how many items I can select?
- Currently you can select up to 100 items at a time as part of your filters.
Customizable columns
Advertiser information (click to expand)
- Ad account name
- Ad account ID
- Delivery status
- Schedule
- Objective
- Daily budget
- Campaign name & ID (Ad group / ad settings)
- Ad group name & ID (Ad settings)
- Review status
- Thumbnail
- Media aspect ratio (Ad settings)
- Ad headline (Ad settings)
- Ad description (Ad settings)
- Landing Page URL (Ad settings)
- Budget spent
- Lifetime spent
Popular metrics (click to expand)
- Viewable imps
- Clicks
- Viewable CTR
- CPC
- Viewable CPM
- Video views
- Video views at 25%
- Video views at 50%
- Video views at 75%
- Completed video views
- Reach
- Frequency
Conversion metrics (click to expand)
- Purchase
- Purchase rate
- Cost per Purchase
- Add to cart
- Add to cart rate
- Cost per Add to cart
- Initiate checkout
- Initiate checkout rate
- Cost per initiate checkout
- Submit form
- Submit form rate
- Cost per submit form
- Subscribe
- Subscribe rate
- Cost per subscribe
- Complete registration
- Cost per Complete registration
- Contact
- Contact rate
- Cost per Contact
- Sign up
- Sign up rate
- Cost per Sign up
- View content
- View content rate
- View content rate
- Cost per View content
- Add payment info
- Add payment info rate
- Add to wishlist
- Add to wishlist rate
- Cost per Add to wishlist
- Visit cart
- Visit cart rate
- Cost per Visit cart
- Customize product
- Customize product rate
- Cost per Customize product
- Search
- Search rate
- Cost per Search
- Booking
- Booking rate
- Cost per Booking
- Download
- Download rate
- Cost per Download
- Start trial
- Start trial rate
- Cost per Start trial
- Share
- Share rate
- Cost per Share
- Login
- Login rate
- Cost per Login
- Donate
- Donate rate
- Cost per Donate
- Find location
- Find location rate
- Cost per Find location
- Time spent
- Time spent rate
- Cost per Time spent
