
Using SmartNews Pixels in Shopify themes
SmartNews Pixels can be easily integrated into your Shopify themes. This page will guide you through the steps of installing SmartNews Pixel tags in Shopify.
1Prepare a SmartNews Pixel
Set up a SmartNews Pixel and create a conversion event in SmartNews Ads Manager.
Setting up Pixels and events in SmartNews >
Once your Pixel is ready, copy its base code on the Pixel setup screen.
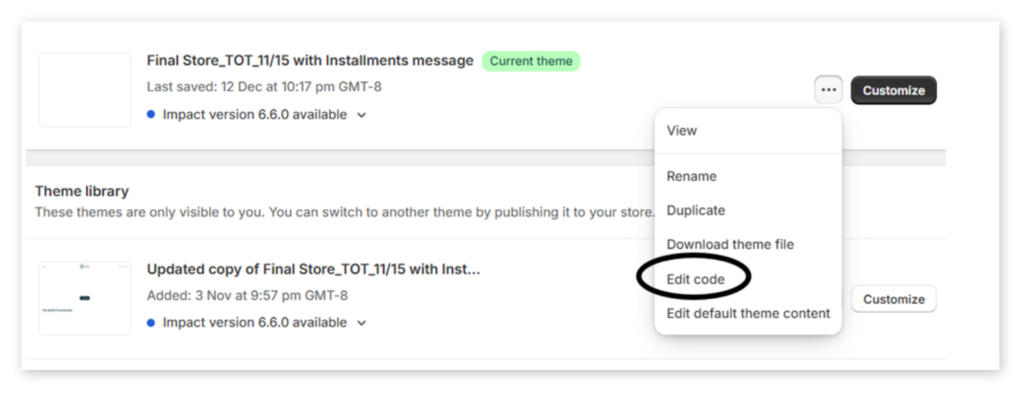
2Add the base code to your Shopify theme
Paste the base code in the <head> section of theme.liquid.
If you use any third-party page creation extensions for Shopify, make sure the base code is also included in those extensions’ theme.liquid files.

3Configure events in Shopify
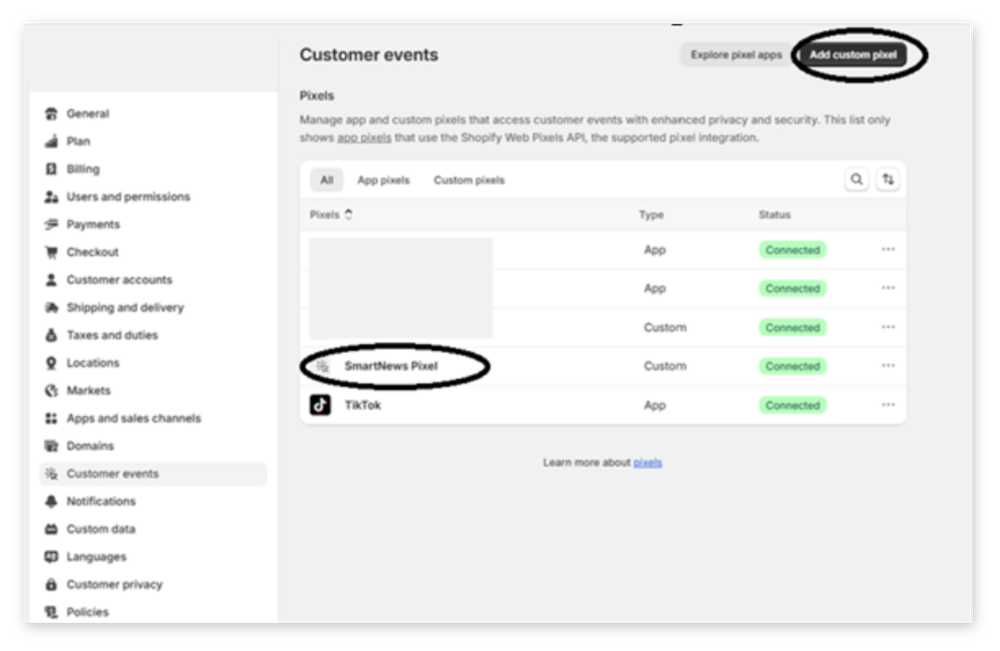
1. From your Shopify admin account, go to Settings > Customer events.
2. Select Custom pixels.
3. Select Add pixel.
4. Paste your event code into the code window. It may look something like this:
// SmartNews Ads Pixel Initialization |
5. Replace YOUR_PIXEL_ID in the example above with your actual SmartNews Pixel ID.
4Verify implementation
Check that your SmartNews Pixel is connected under Setting > Customer events. If the Pixel is shown as “Disconnected”, select Connect to link it with Shopify.
Finally, make sure that events are firing correctly and being received in SmartsNews Ads Manager by running some tests in your Shopify environment.
Event mapping reference
| Shopify event | SmartNews event |
|---|---|
page_viewed | PageView |
product_viewed | ViewContent |
product_added_to_cart | AddToCart |
checkout_started | InitiateCheckout |
payment_info_submitted | AddPaymentInfo |
checkout_completed | Purchase |
FAQ
Q:How do I verify my Pixel implementation on dynamic pages?
A:For dynamic pages that require specific user actions, the Pixel validator might incorrectly report that the Pixel hasn’t fired. You may need to perform actual user actions to properly test the implementation.
Q:Can I track multiple events with the same Pixel?
A:Yes, you can track multiple standard events like PageView, ViewContent, AddToCart, InitiateCheckout, AddPaymentInfo, and Purchase with a single Pixel implementation.
